We have already discussed the method and steps involved to partition your hard drive for Windows 7. Here we will talk about doing the same thing but on a machine running Windows 8.
Partitioning your hard drive on a computer that operates under Microsoft’s Windows 8 or the updated Windows 8.1 isn’t something you should fear or be reluctant about, as it is in fact pretty straightforward. Due to the Disk Management feature which is integrated and available in the Windows 8 or 8.1 system, you can partition your hard drive just by using that and a third party partition manager, which is free. These easy to use tools make the process more accessible, and users can avoid rebooting and reinstalling their operating systems altogether.
Why should I partition my hard drive?
The need to partition your hard drive can occur for various reasons. For instance, you might want to partition your hard drive so you can better assess your available storage capacity, and make the best of the internal memory you have. Grouping certain file types and managing your documents and programs can become much more convenient if you give your hard drive a good partitioning.
When do I partition my hard drive?
There are situations where the current condition of your computer can be upgraded by partitioning your hard drive. There are also cases where partitioning is no longer a simple option to keep in mind, but rather a necessity. Such a predicament is when you have only one partition on your hard drive. This can be detrimental to your system’s performance, and dividing your hard drive into multiple partitions can help you not only better organise your files, but also boost the system’s performance. Another similar situation is when you buy a new hard drive. Being new and all, it is highly unlikely that it will magically come with your preferred configuration. Therefore, you will have to do a quick hard drive partitioning.
There are two ways you can get this done. One involves the included feature inside Windows 8 and 8.1, and one will require free partition manager software. Let’s take a look at the steps involved to partition your hard drive on Windows 8 And 8.1 systems.
Partition Hard Drive with Windows’ Disk Management
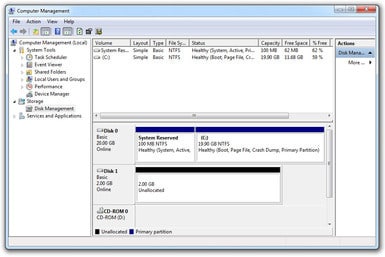
- The first thing you need to do is press Windows+R to bring up Run, where you will type diskmgmt.msc. This will bring up a pop-up window.
- From the respective window, right click on the C: drive and use the Shrink Volume option.
- Next, you will be prompted to enter the amount in MB of space you want to shrink your drive.
- After you choose to shrink the volume, an unallocated space will be available. You have to, right click on the unallocated drive and select New Simple Volume.
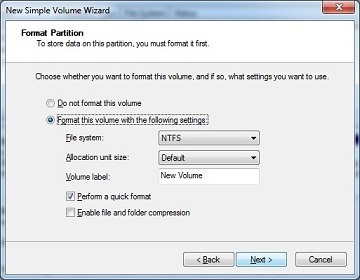
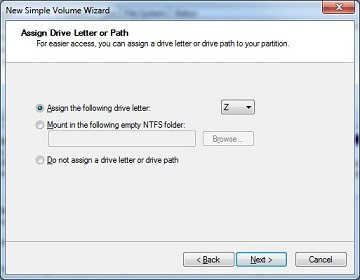
- Next off, just follow the on-screen instructions, and you’ll have a new hard drive partition.
The Disk Management feature found in Windows 8/8.1 is pretty neat.
Use AOMEI Partition Assistant to Partition your Hard Drive
If you want to partition your hard drive using something that offers a few more options, you can use AOMEI Partition Assistant, this is an advanced partition manager, and it provides a combination of basic options and some more advanced cool features such as, Disk Copy Wizard, Move/Merge Partition, etc. The software is recommended for all Windows versions, and not just Windows 8/8.1.
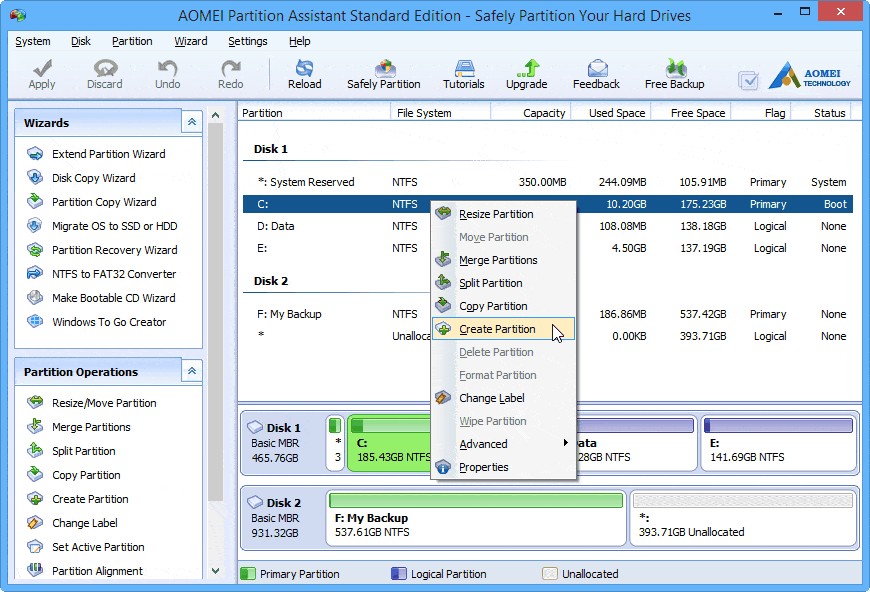
- First off, install the program, then right click on the C drive and choose the Create Partition option.
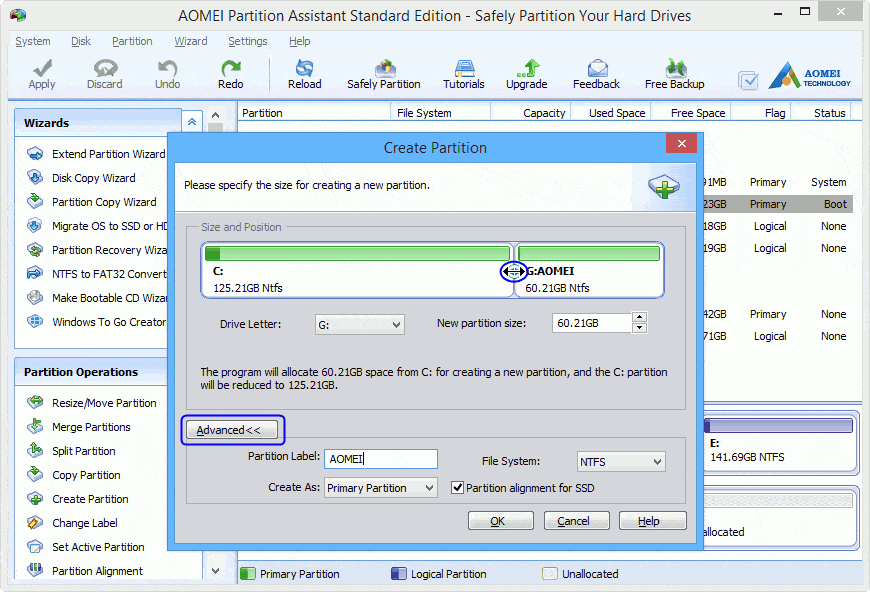
- Pop-up windows will follow, giving you the option of manually inserting the desired amount for your new drive, but also a slider you can drag to determine the size of the new drive. The drive letter can be changed as well. You can also play around with a few more options, like setting a label for the partition and selecting its type. File system settings are accessible through the Advanced menu.
- After you click on OK, you will have yourself a new partition.
If you are in the mood for enhanced hard disk management services such as moving free space from one partition to another, moving the OS or change partition types; you might want to give Partition Assistant Professional Edition a try.
If you faced any difficulty in any of these steps, do let us know in the comments so we can guide you further.
You May Also Like
- Creating A Recovery File And Recovery Partition [How To]
- Turn Your Windows 8 PC Into An Internet Hotspot


